Tuesday, 4 October 2011
Tuesday, 3 May 2011
FINAL PRODUCT!
After 2 months of designing, eating, and sweating; it was time for the final product. Through a collaboration between all 4 groups - SIPs, Framing, Planning, and the Fireplace group; we came to a comprehensive, yet cohesive design for the cottage. This process really made us realize how pulling together as a team is really essential to the success of any design project.
This is the final design proposal for the Sunday Design Team. The final poster was created by Gloria P. to showcase our comprehensive design concept for the cottage - bringing together the wet module designed by the Planning group, with the living and kitchen spaces designed by the Fireplace group, together with the building structure designed in a collaborative effort by the the Framing and SIP groups.
FINAL RENDERING - DARIA I. |
This is the final design proposal for the Sunday Design Team. The final poster was created by Gloria P. to showcase our comprehensive design concept for the cottage - bringing together the wet module designed by the Planning group, with the living and kitchen spaces designed by the Fireplace group, together with the building structure designed in a collaborative effort by the the Framing and SIP groups.
The image is a blow-up representation of the Pefferlaw project. It displays in sequence the structural elements that make up the house. From exterior to interior the home is comprised of recycled wood slats as a decorative cladding used from the recycled trees on the site on top of SIP panels constructed a few kilometres off site. The panels are attached to PCL structural columns, and purlins that are exposed to the interior. On the river side of the property, the house will be surrounded by glass cladding and a nano wall that allows users to flow in and out of the home with ease allowing nature and the outdoors to become one with the interior space.
Day 5/6
SIPS FROM SCRATCH
The afternoon spent in Pefferlaw was a highly productive time period. The goals of the day were to set-up a system to construct the SIPs, begin constructing them, and continue work on the model. Testing of stains for the Douglas fir panels of wood on the SIPs was done to determine desired colours and effects that varnish can have on the selected type of wood. Since this is the first execution of this style of home, every detail needs to be accounted for and analyzed in advance of the build.
The first task for one group of students was to test the glue that we are using to construct the SIPs. Not only does this allow its strength to be tested, but is also ensures the glue will be properly applied to each and every panel. We selected PL Premium, and used caulking guns to distribute the glue. Small pieces of fir were used to test the method of glue placement, as well as the necessary thickness needed to seal the Plastifab foam to the wood. The group of students building the model continued to construct individual SIPs for the building.
The next group of students transported 2x4s and 2x8 across the factory to be cut in half and then used to support the plywood panels at the assembly area. In order to maintain our concept of re-use, we attempt to divert our garbage from the landfill. The plastic that wrapped every grouping was foam was cut into the same size piece as the plywood is. The plastic allows for protection of the aesthetically pleasing side of the fir to be protected from damage or scratches.
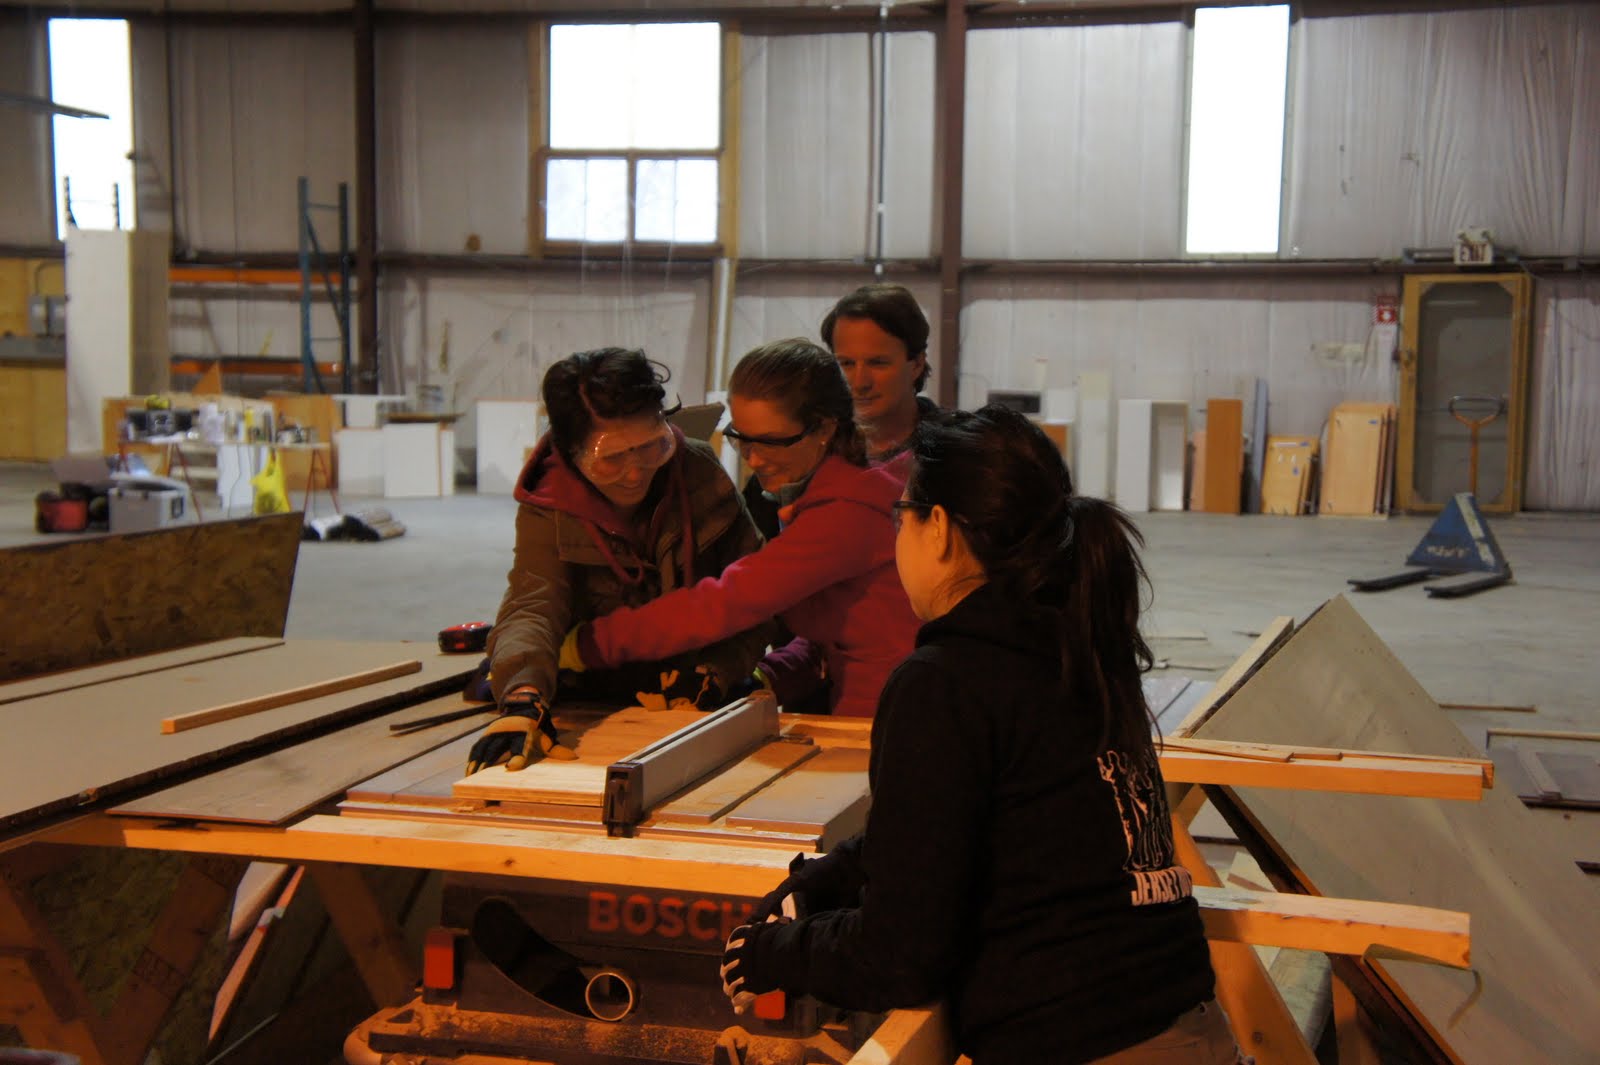
Before any gluing of the SIPs could begin to occur, the SIP need to be set-up exactly as it would be constructed to determine how to place enough pressure on the system. Between the metal supports we have in the construction side of the factory, 2x4s, 2x8s, plywood, foam, and cedar pieces needed to be tested and re-tested at least 10 times to achieve a high pressure situation. This pressure would ensure an even distribution and seal of the glue between the foam and plywood.
SIP CONSTRUCTION IN A NUTSHELL
1. PLACE PLYWOOD ON FLAT SURFACE AND SPREAD GLUE EVENLY
2. PLACE FOAM CAREFULLY ON TOP OF PLYWOOD
3. SPREAD MORE GLUE EVENLY AND PLACE SECOND SHEET OF PLYWOOD ON TOP OF FOAM
4. EVENLY WEIGH DOWN THE COMPLETED SIP AND LET DRY
AND THERE YOU HAVE IT, SIPs in 4 EASY STEPS!
Another group of students spent the afternoon testing different finishes for the staining of the SIPs. This was done outside to ensure proper lighting and a true understanding the value of colour that comes from the staining. The following stains were tested on boards and analyzed:
· Plain Satin
· Linseed Oil
· Semi-Gloss
· Plain Tung Oil
· Black Semi-Gloss
The following 50/50 mixes were also tested:
· Tung and Semi
· Tung and Satin
· Linseed and Satin
· Linseed and Semi
· Black Semi-gloss Tested in 20%, 50%, and 100% volumes
· Black with satin- Tested in 30%, and 50% volume
Overall, every category was additionally tested with 1 coat, 2 coats and 3 coats to also consider different opacities. A red with semi gloss was also tested, but did not mix well or work out at all when the girls began the application process. The conclusions drawn by this group so far are to use black plain on the exterior of the house, plain semi-gloss for the interior walls, and 50% black semi-gloss for the interior module.
Day 4
The Framing Group started the day hard at work. They were responsible for creating the scale model - from using the table saw to cut scale size columns, and SIP panels to putting it all together.
While they were busy working away, the rest of us went to the site to take a look at the construction progress, and help transport the the recycled hemlock siding back to the warehouse.
We also spent a lot of time chipping away at the 4 inch thick ice that had settled around the foundation. An hour of breaking ice with shovels is probably what made my triceps sore for the next couple of days!!!
Next, we made our way back to the warehouse and of course we were hungry! I know you're all wondering about this week's potluck theme...
MEXICAN!!!
After many taquitos, salsita, and some others dishes that were not so Mexican, our tummies were full and we got back to work.
Our next task, was to carry the rebar, give our triceps more of a workout, and lay the rebar again.
Saturday, 16 April 2011
Day 3
Building the model
March 27, 2011
9am: Group Meeting
Craig caught us up to speed with the developments over the week. Definitely ordering materials was essential - so a day full of planning and finalizing plans was in order. The sooner we finished our planning , the sooner Craig could order materials - plywood, foam, glue, and so on...
The Framing Group began the creation of the scale model. The placement of the columns was more easily determined by looking at the 3D model.
and finally, what you were all waiting for... This week's POTLUCK!!!
The theme: Italian
Day 2
Design, Construction, and ... Potluck?
March 20, 2011
Materials |
Day 2 began with a group meeting as always. We learned about the materials Craig had in mind for this project, and started to really contemplate what are designs are going to look like. We were divided into 4 groups: Structurally Insulated Panels (SIPs), Framing, Planning, and Fireplace. From this point on we will work in our individual teams, but the collaboration between teams is vital to a successful final design.
To find more information on each of the groups and their development, you can check them all out by clicking on the tabs labeled with each group name.
Laying Re-bar was on the agenda for today. As a group, we continued what the Saturday group had already started. Laying the re-bar mock-up was a labourous task in itself. Even with the strength of 10 girls, those re-bars are quite heavy.
The benefit of this project is that we actually get a hands-on experience of the construction process. In my personal opinion, hands-on is the best way to learn. From actually laying this re-bar structure, we can actually see what the effect of the re-bars will have on the construction of the concrete slab and in turn, the entire design planning of the house. With this, we also get to see what the conduit plan looks like in relation to the rest of the three-dimensional planning.
What happens when you bring 10 girls to a construction site???
POTLUCK!!!
Why not add a fun spin on the design and build project, and bring potluck in the mix?! And so, the weekly themed potluck was born...
Week 1: Theme: INTERNATIONAL
While international is great, maybe an international theme for a potluck was perhaps a bad idea. As the nausea set in, we all soon realized that a more specific theme was vital to our success in construction.
We will return next week with a new potluck theme, and some more design developments. I will leave you now with some pictures of the day's work...
Day 1
7am ... well, really 6am
March. 13. 2011
Our first day at Pefferlaw started out early, really early. Of course, our first day would begin on Daylight savings - so what was supposed to be a 7am wake-up was really a 6am wake-up call. The drive ahead of us was about an hour, into a town that seemed to be in the middle of no where. With no cars on the road, it was a speedy trip. We arrived at the warehouse at 9am sharp.
Now, you're probably wondering by this point exactly what a group of girls are doing at 9am on a Sunday morning at an empty warehouse??? Well, we are the design and build team for a netzero cottage. For the next 6 weeks or so, you will see us brainstorm, research, design,and even begin to build this cottage. You may also see us eat (lots), sleep (little), and go a bit crazy at times...
Day 1 consisted of measuring the kitchen cabinetry we already had, a tour of the warehouse, moving some 2x4's, and of course - having a little fun. We were all happy to finally get a chance to use our workboots, hardhats and gloves - and I was truly glad I did, because at one point I found a nail in the sole of my boot!!
Kitchen Cabinetry [to be restored...] |
Bi-fold doors to be re-used |
Our first day ended in a visit to the actual site where the cottage is being built. Eventually we will see the development of the cottage that will cantilever over the river.
View from the 'cottage' |
Our stylish design team braving the cold Canadian winter weather |
3:00pm End of Day 1
The day was coming to an end, and we all had a long drive home. We gathered around the garage for one last picture of the day, and parted ways.
Subscribe to:
Posts (Atom)